
Deploying a fresh Linux instance takes only seconds, but an unsecured server exposed to the public internet attracts automated port scanners within minutes. Following a verified ubuntu server hardening checklist is the most reliable way to minimize your attack surface and protect production workloads from unauthorized intrusion.
In this guide, you will walk through seven mandatory security configurations tested on Ubuntu 22.04 and Ubuntu 24.04 LTS servers. Each step includes exact terminal commands and configuration snippets you can apply immediately.
Looking for more sysadmin and network guides? Explore our complete library of guides and tutorials or see how to diagnose network connectivity and DNS configuration issues on local machines.
Quick Overview: The Hardening Checklist
| Step | Security Layer | Primary Benefit |
|---|---|---|
| 1. SSH Security | Authentication | Disables password logins and prevents root exploitation. |
| 2. UFW Firewall | Network Perimeter | Blocks all unauthorized incoming network traffic. |
| 3. Fail2ban | Intrusion Prevention | Automatically bans malicious IPs probing for logins. |
| 4. Unattended Upgrades | Patch Management | Installs critical kernel and package security patches automatically. |
| 5. Secure /dev/shm | Memory Space | Stops malicious scripts from executing inside shared memory. |
| 6. Port Auditing | Process Inspection | Identifies unnecessary background listening daemons. |
| 7. Log Auditing | Monitoring | Maintains audit trails for forensics and anomalous behaviors. |
Step 1: Disable Root Login and Enforce SSH Keys
Default SSH setups frequently permit root logins with passwords. Consequently, attackers utilize automated dictionaries to brute-force access. Therefore, you should always create a sudo non-root user and restrict authentication strictly to Ed25519 or RSA-4096 public keys, as recommended by the official Ubuntu Server security guidelines.
# Create a dedicated administrative user
adduser deployer
usermod -aG sudo deployer

# Copy your public key to the new user's authorized_keys directory
rsync --archive --chown=deployer:deployer ~/.ssh/id_ed25519.pub /home/deployer/.ssh/authorized_keys
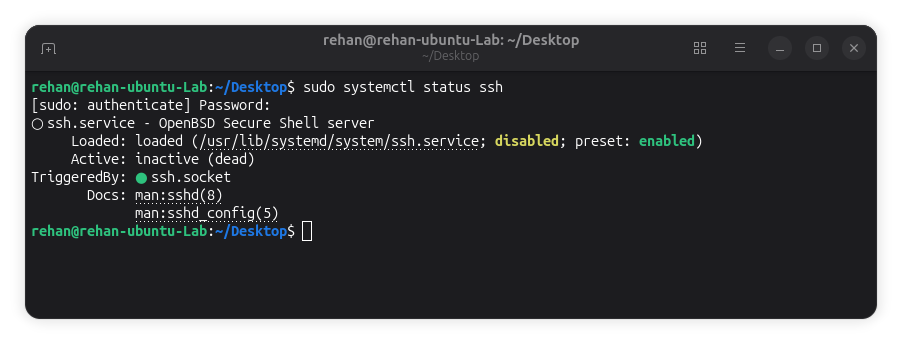
Once OpenSSH is installed, verify that the daemon and its socket listener are active before editing your security configuration:
Next, edit the primary SSH daemon configuration located at /etc/ssh/sshd_config:
PermitRootLogin no
PasswordAuthentication no
PubkeyAuthentication yes
X11Forwarding no
MaxAuthTries 3
Sysadmin Tip: Never close your existing SSH connection before testing your new user credentials in a second terminal window. Doing so prevents accidental lockouts.
Step 2: Configure UFW (Uncomplicated Firewall)
A firewall operates as your primary defensive perimeter. By default, UFW is dormant on fresh Ubuntu installations. You must configure default ingress rejection before activating the firewall, adhering to standard Canonical UFW best practices.
# Establish default traffic policies
sudo ufw default deny incoming
sudo ufw default allow outgoing

# Allow standard SSH (or your custom port)
sudo ufw allow 22/tcp

# Allow web traffic if running a public server
sudo ufw allow 80/tcp
sudo ufw allow 443/tcp

# Enable firewall protection
sudo ufw enable
sudo ufw status verbose
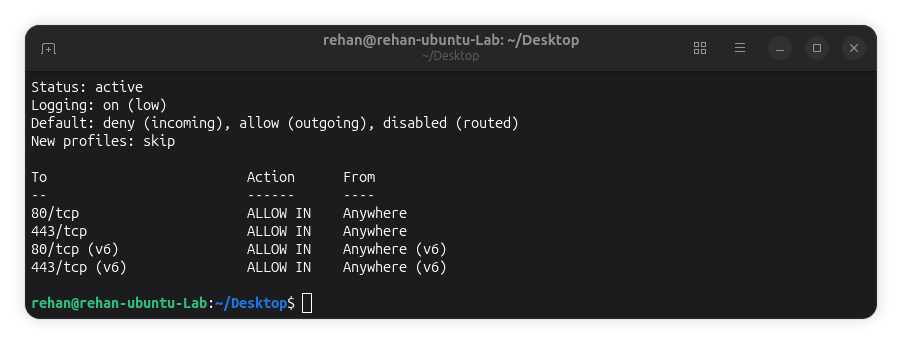
Verify that the firewall is active and enforcing your security boundaries by inspecting the verbose status output:
Step 3: Implement Fail2ban Against Brute-Force Attacks
Even with passwords disabled, bots will bombard your SSH port with endless connection handshakes, degrading server resources. Fail2ban parses authentication log files and updates your firewall tables to drop recurring offenders.
# Install Fail2ban package
sudo apt update && sudo apt install fail2ban -y

# Create a localized jail configuration
sudo cp /etc/fail2ban/jail.conf /etc/fail2ban/jail.local
Open /etc/fail2ban/jail.local and adjust the bantime parameters:
[sshd]
enabled = true
port = ssh
maxretry = 3
findtime = 600
bantime = 3600
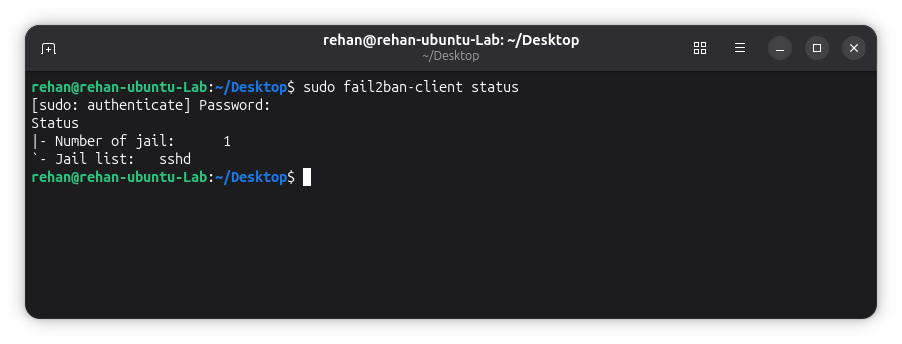
Once started, confirm that the daemon is actively monitoring your authentication logs by checking the jail status with fail2ban-client:
Step 4: Enable Automated Security Patches with Unattended-Upgrades
Zero-day vulnerabilities and Linux kernel exploits surface continuously. Manually running patch commands every morning is inefficient. The unattended-upgrades utility automatically downloads and applies security patches without interrupting active services.
sudo apt install unattended-upgrades update-notifier-common -y
sudo dpkg-reconfigure --priority=low unattended-upgrades
Furthermore, ensure that the configuration file at /etc/apt/apt.conf.d/50unattended-upgrades includes security repository origins:
Unattended-Upgrade::Allowed-Origins {
    "${distro_id}:${distro_codename}-security";
};
Unattended-Upgrade::Automatic-Reboot "false";
Step 5: Restrict Shared Memory Space (/dev/shm)
Malicious processes and rootkits often leverage /dev/shm because it provides a read/write RAM filesystem accessible by multiple processes. Hardening this mount point with the noexec and nosuid flags blocks scripts from executing directly from memory, satisfying benchmark requirements from the CIS Ubuntu Linux Benchmark.
Append the following line to /etc/fstab:
tmpfs /dev/shm tmpfs defaults,noexec,nosuid,nodev 0 0Remount the shared directory to enforce these boundaries without rebooting:
sudo mount -o remount /dev/shmStep 6: Audit Open Ports and Terminate Unused Daemons
Every unnecessary daemon running in the background represents an unmonitored attack surface. Regularly inspect listening sockets with the modern ss tool:
# Inspect all active listening TCP and UDP sockets
sudo ss -tulpn
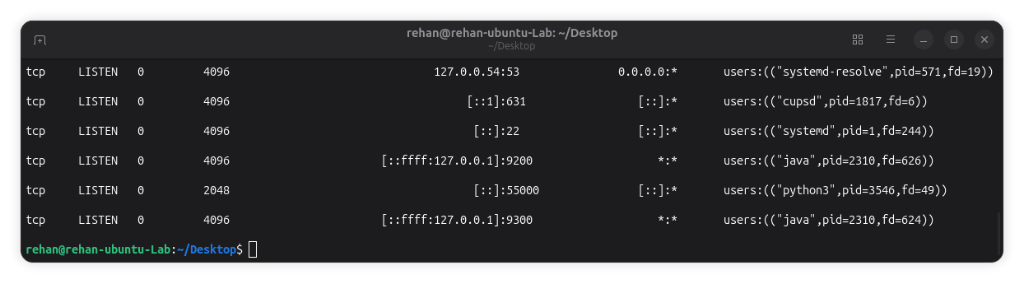
Inspect the output table to verify that only expected daemons are bound to external interfaces, and that sensitive local services remain restricted to 127.0.0.1:
If you identify legacy or unwanted daemons (such as RPC, cups, or unneeded database instances bound to 0.0.0.0), stop and disable them immediately:
sudo systemctl stop <service_name>
sudo systemctl disable <service_name>
Step 7: Enforce Audit Logging and File Integrity (auditd)
To comply with modern cybersecurity frameworks, you must maintain immutable audit trails of sensitive modifications. The Linux Audit Framework (auditd) logs unauthorized permission changes and file tampering events.
# Install auditd
sudo apt install auditd audispd-plugins -y
sudo systemctl enable --now auditd
Monitor critical identity files by appending watch rules into /etc/audit/rules.d/audit.rules:
-w /etc/passwd -p wa -k identity_changes
-w /etc/shadow -p wa -k identity_changes
-w /etc/ssh/sshd_config -p wa -k sshd_config_changes
Frequently Asked Questions (FAQ)
Will this Ubuntu server hardening checklist break my existing web applications?
No. When implemented properly, these hardening steps only restrict unauthorized root access, unmonitored ports, and malicious brute-force attempts. However, make sure to permit application ports (e.g., 80, 443, 3306) in your UFW configuration before enabling the firewall.
How often should I audit my server security post-hardening?
We recommend running an automated auditing scan once a month using tools like Lynis (sudo apt install lynis && sudo lynis audit system) to verify that updates have not modified your security configurations.
Conclusion and Next Steps
Completing this ubuntu server hardening checklist significantly raises the difficulty of compromise for any attacker probing your infrastructure. By enforcing key-based SSH, restricting traffic through UFW, and automating daily security patches, your server is safeguarded against automated exploitation.
For more actionable tutorials, browse through our Digital Safety tutorials and our About Us mission statement, or get in touch with our team directly via our Contact Us page.